 You can do all kinds of things with a custom tab on a Facebook page. Link to a book landing page, link to a page of cat videos…the sky’s the limit. 🙂
In this image, you can see a custom tab named “Bundles” at the bottom of the left sidebar on a Facebook page. When you click on that tab, the content you specify will be displayed in the middle of the page – to the right of the sidebar, and below your cover photo and the Like, Follow, etc. buttons.
You can add multiple custom tabs to a page. This means you can create a custom tab for a new release, one for your fiction, one for a sale, etc.
Here’s how!
Prerequisites
These instructions assume you’ve already set up:
- A Facebook profile.
- A Facebook page.
- The page you want to display when someone clicks on your custom tab.
Steps to create a custom tab
- Log in to Facebook as a developer.
Don’t be alarmed by this. You don’t actually need to know anything about software development. 🙂
Go to https://developers.facebook.com/apps, and log in with your normal Facebook credentials. - Click the “+ Add a New App” button. A dialog with the title “Create a New App ID” will pop up.
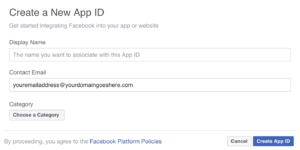
The ‘Display Name’ is the name that will be used for the tab you’re creating. Set this value, pick your category, then click on “Create App ID.”
- You should now be in your App Dashboard. Click “Settings” in the left sidebar, then click “+ Add Platform,” which appears near the bottom of the main window.
- Select “Page Tab” as your platform.
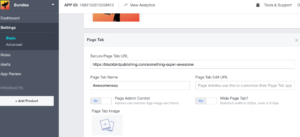 For “Secure Page Tab URL,” enter the URL to the web page you want to have displayed inside your Facebook page when a user selects the new tab.
Make sure to use a secure URL (i.e. the URL must start with https://,
not http://).
- Save.
- In your browser, substitute the specified parameters, then go to http://www.facebook.com/dialog/pagetab?app_id=YOUR_APP_ID&next=YOUR_URL. Replace YOUR_APP_ID with the app id in your app’s settings, and replace YOUR_URL with the Secure Page Tab URL.
For example:
http://www.facebook.com/dialog/pagetab?app_id=1234567890&next=https://yourdomain.com/pagename
- If you’re using Chrome, you may find that it attempts to search for this URL, instead of taking you to it. I’m sure there’s a super easy solution for this, but I got annoyed and entered the URL in a different browser. 🙂
- If you find you get an error 191, add the website’s home URL (in my case, this was blackbirdpublishing.com) to the “App Domains” field, which should appear near the top of the page.
- If you’re using Chrome, you may find that it attempts to search for this URL, instead of taking you to it. I’m sure there’s a super easy solution for this, but I got annoyed and entered the URL in a different browser. 🙂
- The Add Page Tab dialog should appear, asking you which Facebook page(s) you’d like to add your new tab to. Select the appropriate page.
- Test to verify that this is working and that your custom content looks right. It’s also a good idea to view your content on other devices, like your phone or table.
Now what?
Create another custom tab, of course! 🙂
One note: I originally pointed to my publishing website’s bundle page, which has a header and a sidebar. That looked kind of weird when viewed through Facebook, so I created a special header-less, sidebar-less page on my website. That page looks okay, but I’m going to play with it to make sure the content is optimized for Facebook instead of for my website.
Sign up for the Blackbird Publishing newsletter!