
How-to: View images in high resolution using InDesign
It can be a bit disconcerting to realize the resolution of the book cover you’re working on in InDesign looks terrible even though you know you’re using a high-resolution image. But never fear – this is super easy to fix!

Display Performance
The resolution you see while you’re working in InDesign is not the same as the final product.
InDesign provides three levels of quality for viewing images. If you’re working on a slower computer, are working with a lot of images, or are running a lot of applications on your computer at the same time, you might not need to see your images in high quality.
The three levels are:
- Fast Display: The entire image is completely grayed out. This optimizes performance, but (obviously) makes it a little challenging if you need to do any image manipulation.
- Typical Display: Images are displayed, but look a little blocky, especially if you zoom in. This is the default setting.
- High Quality Display: Images are displayed at their full resolution. This allows you to see the highest quality version of your images, but InDesign may run more slowly as this setting requires more system resources to display.
How to change the display performance
- Select View > Display Performance, and then select the desired display level.
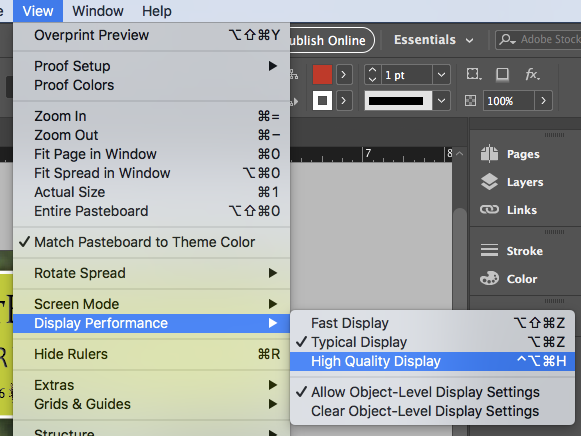
Selecting High Quality Display will show your images at their highest resolution. You can change this to ‘Fast Display’ if your computer is slow, and you don’t need to see the images for whatever task you’re working on.

InDesign version
The version of InDesign used for this post was Adobe InDesign CC 13.1, on macOS High Sierra 10.13.6.