Linking your blog to your Goodreads author profile

There are two options for displaying your blog on Goodreads.

  1. Link your existing blog to your author profile.
  2. Create a blog on Goodreads as part of your author profile.

     
    If you don’t have an author website, and don’t plan to have one, option #2 may be for you. If, however, you do have or plan to have your own website, it’s very quick and easy to link your blog to your author profile on Goodreads.

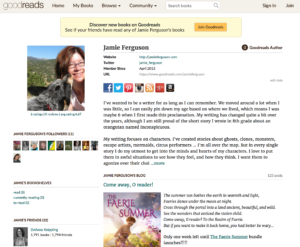
    Your blog posts will be displayed underneath the biography section on your author profile page.


    Note: If you’re interested in how I got the social media buttons to display at the top of my bio, instructions are in this post:
    Adding social media buttons to your Goodreads author profile

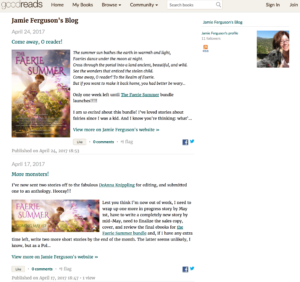
    Here’s what the reader will see if they click on the name of your blog, which appears in between your biography and your blog posts on your author profile.

    How to link your blog to your author profile

    • Log in to your Goodreads author account, and edit your author profile.
    • On the right-hand side of the screen, click on the “edit blog” link.
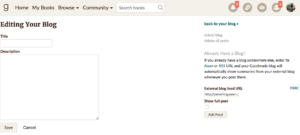
    • The “Editing Your Blog” page is displayed.


      You want to link to your existing blog, so ignore the Title and Description fields.
       
      On the right-hand side there’s an option to set an “External blog feed URL.” This is where you’ll post the link to your blog’s feed (i.e. the stream of posts on your blog). Enter your URL.
       
      In my case, my URL is http://jamieferguson.com/feed. The URL to your blog’s feed may be in a different format depending on how your website is set up.
    • There will be one option: “Show full post.” Select this if you want the complete text of each post to display on Goodreads. If you don’t select this, readers will only see the first part of your post, and will have to expand to view the complete text.
       
      I’ve chosen to not display the full posts in order to have more of my posts appear on the screen, but either option is fine.
    • Click “Add Feed,” and you’re done!

Using Jetpack’s “Related Posts” feature

Jetpack is a WordPress plugin that packages a number of features that are provided to people whose sites are hosted on WordPress.com. If you’re hosting your site on WordPress.com, you already have these features; if you’re hosting your site somewhere, you will need to install the Jetpack plugin (which is free).

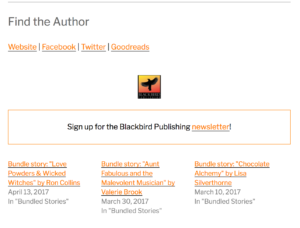
The Related Posts feature analyzes previous posts you’ve published on your site, then underneath each individual post it displays links to three other posts that are related to your current post.

If you’ve set a featured image for a post, that’s what will display when it’s listed as a related post; otherwise, an image attached to the post will be used. The image will be resized and cropped to be 350x200px.

Note that if the contextual analysis doesn’t come up with at least three good results, no related posts will be displayed.

Activate Related Posts

In the administrative section of your WordPress site:

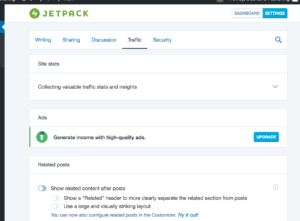
  • Go to Jetpack / Settings / Traffic
  • Under Related posts, turn on “Show related content after posts”

There are two configuration options listed:

  • Show a “Related” header to more clearly separate the related section from posts
  • Use a large and visually striking layout
    (This will display an image from each related post.)

Note: When I turn ‘Show a “Related” header’ on, that actually turns it off – although it correctly displays in the preview while you’re configuring Jetpack. 🙂

Here are examples of how the different permutations will look.

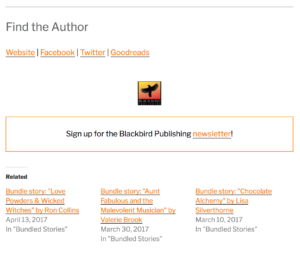
No header, no images

“Related” header, no images

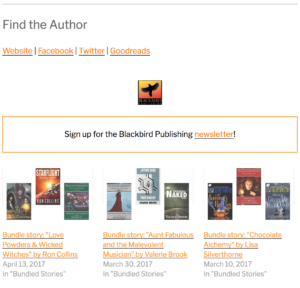
No header, display images

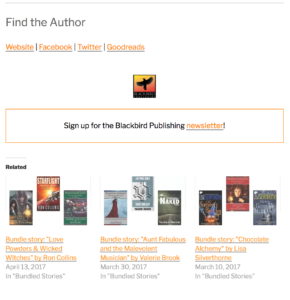
“Related” header, display images

Customize Related Posts for your site

You can customize what image is displayed, how the image is resized, change the “Related” header text, modify how many related posts are displayed, and a number of other things.

Most of these changes require modifying your WordPress theme, so make sure you’re comfortable with that (and that you’ve backed up your site!) before proceeding. Jetpack provides detailed instructions on how to modify your WordPress theme on their site.

How to create a custom tab for your Facebook page

You can do all kinds of things with a custom tab on a Facebook page. Link to a book landing page, link to a page of cat videos…the sky’s the limit. 🙂

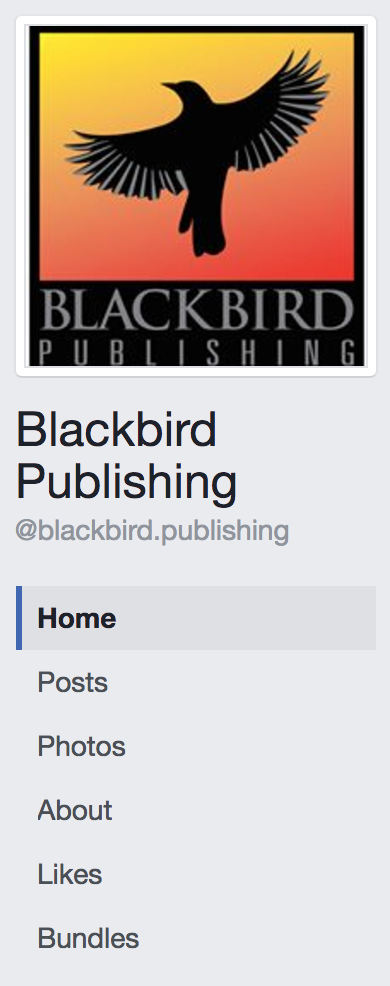
In this image, you can see a custom tab named “Bundles” at the bottom of the left sidebar on a Facebook page. When you click on that tab, the content you specify will be displayed in the middle of the page – to the right of the sidebar, and below your cover photo and the Like, Follow, etc. buttons.

You can add multiple custom tabs to a page. This means you can create a custom tab for a new release, one for your fiction, one for a sale, etc.

Here’s how!

Prerequisites

These instructions assume you’ve already set up:

  • A Facebook profile.
  • A Facebook page.
  • The page you want to display when someone clicks on your custom tab.

Steps to create a custom tab

  • Log in to Facebook as a developer.
     
    Don’t be alarmed by this. You don’t actually need to know anything about software development. 🙂
     
    Go to https://developers.facebook.com/apps, and log in with your normal Facebook credentials.
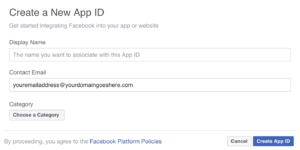
  • Click the “+ Add a New App” button. A dialog with the title “Create a New App ID” will pop up.

    The ‘Display Name’ is the name that will be used for the tab you’re creating. Set this value, pick your category, then click on “Create App ID.”
     
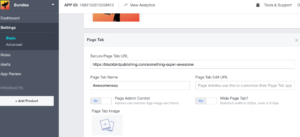
  • You should now be in your App Dashboard. Click “Settings” in the left sidebar, then click “+ Add Platform,” which appears near the bottom of the main window.
     
  • Select “Page Tab” as your platform.
     
  • For “Secure Page Tab URL,” enter the URL to the web page you want to have displayed inside your Facebook page when a user selects the new tab.
    Make sure to use a secure URL (i.e. the URL must start with https://,
    not http://).
     
  • Save.
     
  • In your browser, substitute the specified parameters, then go to http://www.facebook.com/dialog/pagetab?app_id=YOUR_APP_ID&next=YOUR_URL. Replace YOUR_APP_ID with the app id in your app’s settings, and replace YOUR_URL with the Secure Page Tab URL.
     
    For example:
    http://www.facebook.com/dialog/pagetab?app_id=1234567890&next=https://yourdomain.com/pagename
     

    • If you’re using Chrome, you may find that it attempts to search for this URL, instead of taking you to it. I’m sure there’s a super easy solution for this, but I got annoyed and entered the URL in a different browser. 🙂
       
    • If you find you get an error 191, add the website’s home URL (in my case, this was blackbirdpublishing.com) to the “App Domains” field, which should appear near the top of the page.
       
  • The Add Page Tab dialog should appear, asking you which Facebook page(s) you’d like to add your new tab to. Select the appropriate page.
     
  • Test to verify that this is working and that your custom content looks right. It’s also a good idea to view your content on other devices, like your phone or table.

Now what?

Create another custom tab, of course! 🙂

One note: I originally pointed to my publishing website’s bundle page, which has a header and a sidebar. That looked kind of weird when viewed through Facebook, so I created a special header-less, sidebar-less page on my website. That page looks okay, but I’m going to play with it to make sure the content is optimized for Facebook instead of for my website.

The format and placement of copyright information pages

A copyright information page will generally include more than just copyright information. Publication information, disclaimers, and design accreditation also appear on this page.

Note that I’m not a lawyer, and am not providing legal advice.

Where should the copyright information page go?

For a print book, this page should go in the front matter at the beginning of the book. I put mine after the title page, which is what’s most commonly done, but it doesn’t have to go in that exact spot – and of course what’s in the front matter will vary by book, publisher, and author. Look through print books that you consider well-formatted for examples. Note that the copyright information page always appears on the left page in a print book.

For an ebook, this page can go in the front matter, but it’s more commonly put in the back matter, at the end of the book. If your book is available on a website that allows readers to see a preview, placing the copyright page in the front means there’s one less page available for the preview. And while you can and should care about this page, it’s highly likely that your readers won’t.

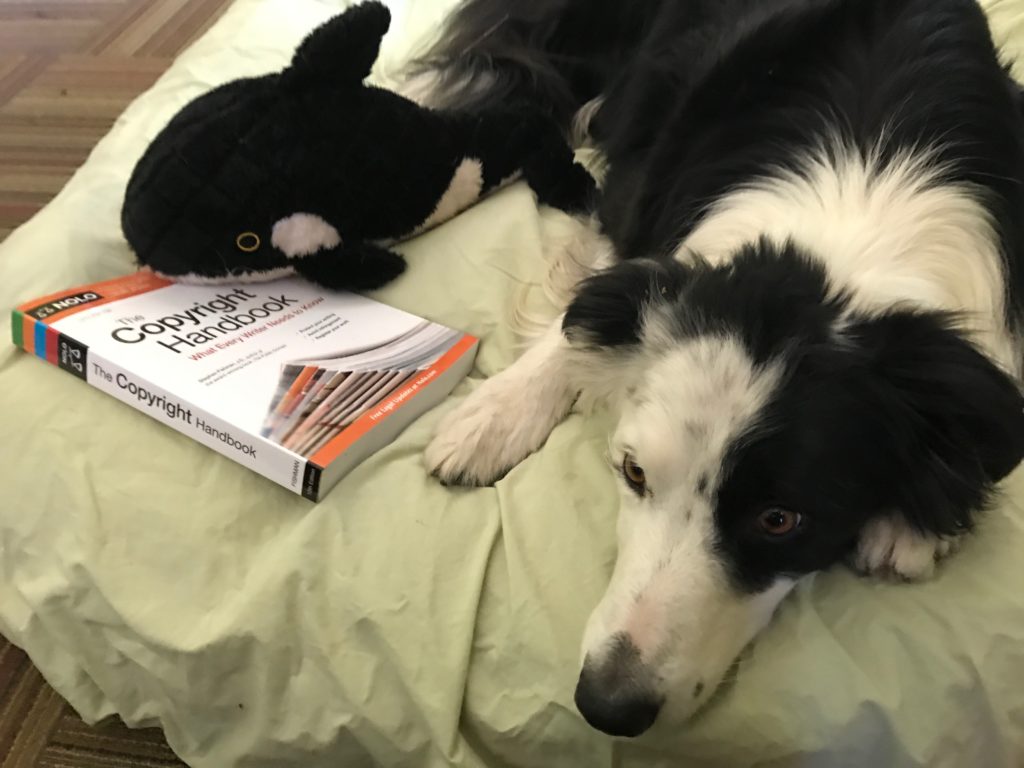
NOLO’s The Copyright Handbook lists specific requirements for where in a book the copyright notice may be located.

Basic elements of a copyright information page

Note that the order in which these elements occur can vary. I suggest you look at other ebooks to decide how you’d like your page to look.

  • Book title
  • Author name
    This isn’t required, but some authors list their name under the title. I don’t include this in my books.
  • Edition
    This isn’t required, but it’s good practice to note the edition if it’s not the first edition.
  • Work of fiction disclaimer
    There’s some question as to whether or not this is necessary, but I put one in just to be safe.
  • Copyright notice
    Refer to a resource like NOLO’s The Copyright Handbook for more information on the various format options and legal requirements.
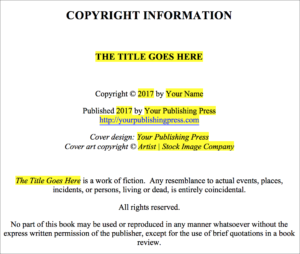
    Here’s an example of what I use in my books:
    Copyright Ⓒ 2017 by Jamie Ferguson
  • All rights reserved statement
    I’ve read that this is not required, but I include this text – partly because almost everyone still uses it, and that way my copyright page looks like a standard page. There is no one right way to word this text – I looked through examples in other books, and based on that came up with something I now use in each of my books.
  • Publisher information
    This is your publishing press name and URL. You can also include a mailing address and/or other contact information. If you don’t have a publishing press, list yourself as the publisher.
  • Credit section
    If you use stock images, or had an artist design your cover or format the interior, this is where you give them credit. Refer to the stock image site or the designer you worked with to determine if there is specific language you’re required to use. Here’s an example of how mine looks:
    Cover design Ⓒ 2017 Blackbird Publishing
    Cover art copyright Ⓒ Artist | Stock Image Company
  • Library of Congress Control Number
    This is only required if you’ve gotten a Library of Congress Control Number. Chances are you have not. 🙂
  • ISBN number
    If you have an ISBN, it should be listed on this page.
  • Country the book is printed in
    This isn’t required, but is often done in print books.

How do you make sure to do this in each book?

I have templates that I use when formatting my books – one for print and one for ebook. On the copyright information page, the pieces I need to update, or at least review (like the copyright year) are highlighted so that I know exactly what I need to look at for each book. I occasionally tweak my template, but even when I do, just having it already set up means I don’t have to remember all of these details every time.

Do you really need a copyright information page?

Not being a lawyer 🙂 I can’t say if you need one or not – but there’s no reason I can think of to not include one. Plus there’s a lot of information on these pages in addition to the copyright notice. For example, if you’re licensing someone else’s artwork for your cover, you’ve probably signed an agreement that requires you to acknowledge the source of the imagery. These pages are also very standard in the industry, and not having one will look odd.

Copyright notices, as opposed to pages, are not required for works published after March 1, 1989, but there are a number of very good reasons to add them anyway.

If you’d like to learn more, or have specific questions about what is/is not technically correct, please refer to NOLO’s The Copyright Handbook, or one of the many other great resources available.

Whale not included.

Author website basics

There are a few very easy – and very important – things all authors should do on their websites. How you do them is up to you – but if you’re not doing these things, you should put them on your to do list right now.

That said, there’s only so much time to fit everything into, so my suggestion is that you make a list of non-writing tasks, prioritize them all, and chip away at them as you have time. This is how I handle these types of things, and while it can feel daunting to look at your list, it also means that when you do have a few minutes you know exactly what the next most important thing is.

Published works

Make it easy to see the books and stories you have published, where to buy each one, and what your latest publications are.

If someone looks at your website and has to dig around to find what you’ve published, they might give up and leave. Ditto for buy links. The entire experience should be as simple and easy as possible.

It’s also important to make it clear what your latest publications are. If the reader thinks the last thing you published was five years ago, they might conclude you’re not actively publishing – even if you’ve published another seventeen books since then. Sure, your dedicated readers will stay on your website, but even with them you want to make this as clear as possible.
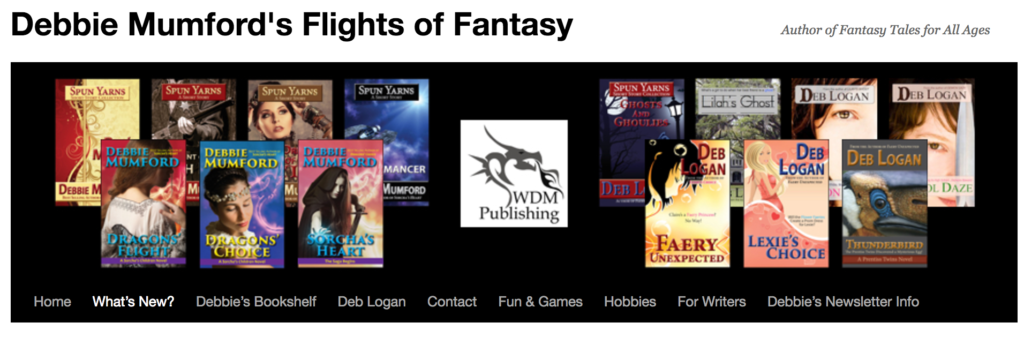

Debbie Mumford does a great job at making it quick and easy to see what she’s published, how to learn more about and buy each story, and it’s clear what her most recent titles are. The “What’s New?” link in her site’s header that goes to a page where she announces new releases. For each title she includes the cover, information about the story, and buy links. In addition to this, the right sidebar of her site has a section called “Check Out Debbie Mumford’s Newest Titles” that contains cover images for her most recent publications. Clicking on one of these cover images takes you to that title’s page on Amazon.

Website -> social media

Links to your social media accounts should be visible on your main page, your blog (if that differs from your main page), and ideally on every other page on your website unless there’s a compelling reason not to put them there. For example, they might not be appropriate on a landing page – but they definitely fit on a page listing all of your published novels.

This is very easy to do, but a surprising number of authors don’t add these links, or else don’t put them on the main and/or blog pages. The easier it is to find you on social media, the more likely it is that people will start following you there.
All of the main pages on my website have a right sidebar which displays buttons linking to my social media accounts at the very top.

Social media -> website

In addition to having links to your social media accounts on your website, make sure to set up links back the other way. And, of course, your social media accounts should link to each other as well.

Consider adding author information to your personal Facebook profile as well.

About the author
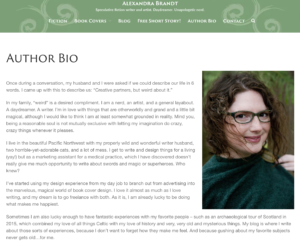
Make sure there’s at least a brief biography/about the author section on your website. Not only will your readers enjoy learning a little more about you, this also should be something that a potential editor, blogger, etc. could pull from for an introduction to you on their site.

If you regularly write in one or more genres, consider adding that information as well.

Alex Brandt’s author bio page is a great example. It includes a photo of Alex – while you don’t have to include a picture of yourself, doing so can help your readers feel a little more connected to you. Alex’s biography gives an overview of what she enjoys writing and why, and her charming personality comes through to the reader.

Contact information

What if someone wants to turn your book into a movie, or wants to ask you to participate in an invitation-only anthology, but but they can’t figure out how to contact you? 🙂

Be careful with what contact information you make publicly available. A lot of authors have contact forms on their sites to keep from getting spammed by programs that search for email addresses. Another option is to list a contact email address, but have it display as an image instead of text. Just make sure you have some way that people can reach you.

Newsetter
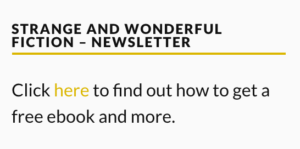
If you have a newsletter, make the fact that it exists clear, and make sure it’s super easy to sign up for.

DeAnna Knippling has a link to her newsletter signup form in the right sidebar on the main pages on her site. Not only does this allow the reader a quick and easy path to sign up, DeAnna also shows a bit of her very interesting personality 🙂 in this section with the text “STRANGE AND WONDERFUL FICTION – NEWSLETTER.”

Personality/branding
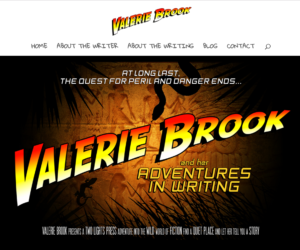
Your personality is going to come out in your website whether you intend it to or not. Put some thought into who you are and what you want to convey, and over time you can modify your site to reflect that.

Valerie Brook’s website is one of my favorite examples of how to incorporate your personality into your branding. She’s got the basic elements present, but by using a movie-like look she grabs your attention on the home page. The header image and font are used throughout her site, continuing her fun theme.
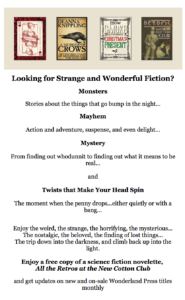
DeAnna’s personality comes out on her newsletter sign-up page. Not only does she make it easy to get to this page, once you’re there it’s hard not to be intrigued and want to sign up for her newsletter – and read her fiction! Notice that she repeats the text “Strange and Wonderful Fiction” which is listed on the sidebar on the pages that link to the newsletter sign-up page.

Adding some of your personality to your site doesn’t have to involve anything complex. For example, one of the things I do on my site is have this super awesome retro shape displayed at the bottom of the sidebar, and every once in a while I use it in other places as well. This is super simple to do, and the image conveys a little bit about my personality.

Now what?

If you’re not sure where to start, don’t panic! 🙂

Make a list of the things you’d like to do to your site, even if you don’t have the time to do them right now. Prioritize these things, even if it’s just noting that one of them is a higher priority than the others. This way you have a plan for what to do and where to begin.

If you want to do something but aren’t sure how you want it to look, consider starting with something basic. For example, it’s totally fine if you have plain hyperlinks to your social media accounts instead of fancy buttons – the key is to get the links set up. You can change how they look later.

When you look at other authors’ sites, pay attention to what you like/don’t like as a reader. This can help you become more aware of what you can do to improve your own website.

I add/improve things on my site bits at a time because I almost never have huge blocks of time – and if I did, I’d want to use most of that time for writing. I keep a list of tasks so I don’t forget what else I want to do with my website, and I add things to it as I learn new things, or realize I missed something a while back. I’ve been working on my site for years, and I don’t see that ever coming to an end. 🙂 But having a plan helps me know what to work on next.

Jutoh and Word, BFFs!

Jutoh is an easy-to-use ebook creation tool that generates ebooks in epub, mobi, and other formats. It runs on Windows, Mac, and Linux, and is inexpensive.

As with all ebook creation software, there are many, many things that you can use Jutoh for. This post focuses on a simple and straightforward way to convert a Word document and a cover image to both an epub and a mobi in mere minutes.

The key to the BFF approach is to set up styles in Word, and have your Word document formatted before running it through Jutoh. Once your styles are set up, you can create a Word template and use that for each new story.

Here are the Word styles I created, and what each is being used for.

  • E Chapter – All headings that will appear in the Table of Contents.
  • E Start of Chapter – The first paragraph for each chapter or section.
  • E Text – Every paragraph in a chapter or section except for the first paragraph.
  • E Title – The title on the copyright page.
  • E Front/back matter – Some text on the copyright page.
  • E Front centered – first line of multiple lines – Text on the copyright page. Used to keep the spacing correct in a section with lines of non-wrapping text.
  • E Front centered – last line of multiple lines – Text on the copyright page. Used to keep the spacing correct in a section of lines with non-wrapping text.
  • E Front centered italics – Text on the copyright page.
  • E Centered Section – Section breaks, as well as some text on the copyright page.

I typically write my manuscript in one document, then make a copy of this template and paste in the text of the story. I do this for two reasons – I find it distracting to have things like the ‘About the Author’ section in a working draft, and I also prefer to write with double-spacing instead of single-spacing, and temporarily changing things like the spacing or the font in a separate document helps me remember to undo those changes when I’m creating the ebook. Because I use the same styles in both files, all I need to do is reset my text from double- to single-spacing, update the book title, copyright information, etc., then save the Word document and run it through Jutoh.

Steps to prepare your Word manuscript for Jutoh

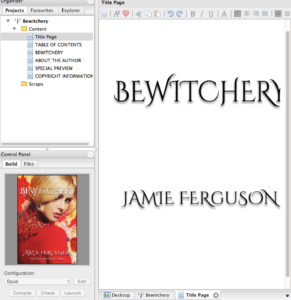
  • Insert a title page.
    This is often the same text that appears on the cover, but without the artwork. You may find you need to move the text around to make it look right without the artwork, and you might remove some things that make sense on the cover but not the title page, like pull quotes.
  • Set the title text in the table of contents, the first page of the story, and the copyright page.
  • Update the bookmark name.
  • Add or update the About the Author section.
    I have a standard set of text in my template, so I rarely modify this section from book to book.
  • Enter all relevant information in the copyright section – the title, copyright year/author name, cover design/artwork attribution, etc.
  • Test all hyperlinks.

Converting your Word manuscript using Jutoh

  • Open Jutoh and create a new project.
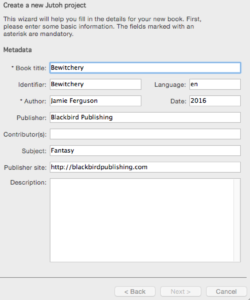
  • Enter the metadata about your book.
  • Confirm the project name and where you’d like to store the files.
  • On the Layout Choice screen, select “Normal reflowable book.”
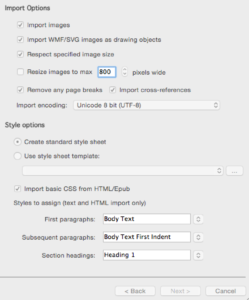
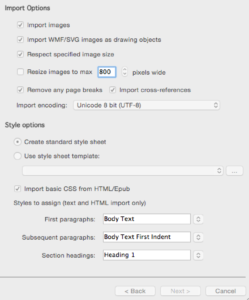
  • You shouldn’t have to change anything on the Import Options screen, but here’s what mine look like just in case.
  • On the Import Method screen, select “From an existing file containing all sections.”
  • Jutoh will pop up a message saying its importing your Word document.
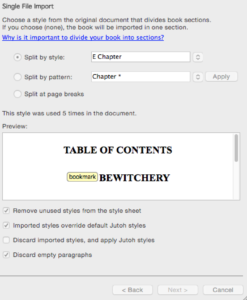
  • On the Single File Import screen, set “Split by style” to whatever style you’re using in the Word document for your chapter headings. If you’re using my styles, this is “E Chapter.”
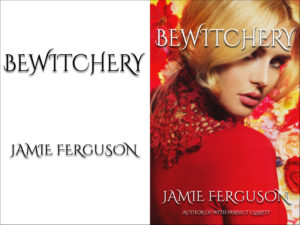
  • Select your cover.
  • Click finish. Jutoh has now imported your file! Now you need to compile your ebook(s).
  • In the Control Panel, choose your desired configuration (ex. Epub or Mobipocket), then select “Compile.”
  • Open your ebook using the appropriate reader(s) to make sure everything came out correctly. I also like to open my ebooks on my phone/iPad as well, just to be safe. And test all hyperlinks! You may think they’re working just fine, but it’s no fun to publish an ebook and realize a day or two later that it contains a broken link. Trust me on this. 🙂

You may get errors if your manuscript has a formatting issue. I ran into a few minor things when I started to use Jutoh, and they were all easy to fix because the error messages were very clear.

You’re welcome to use my Word template as a starting point.

There are many other permutations of things you can do with Jutoh – this is a very simple example, but you can go crazy if you’d like. Check out their documentation and website for more information.

Story bundling for curators: How to choose authors to invite

If you’re curating (aka organizing) a story bundle, how you select authors to invite to participate is entirely up to you. You can publish a call for submissions, or invite only authors whose names begin with the letter M, or who were born under a full moon – anything is fair game.

If you don’t have a firm plan, here are some things you might consider when deciding who to invite.

Quality

A bundle is essentially a box set where each participating author provides a cover, formatted ebook, sales copy, and a short biography. Not only should you consider the quality of an author’s writing, you’re also relying on them to provide a good cover and a well-formatted story. The curator will often not see the finished ebook until launch, and that’s not really a great time to realize an author forgot to add a copyright page, or has an unprofessional-looking cover. So when you’re considering who to invite, it’s worth checking out their existing covers and verifying that they know how to format ebooks.

Not only is this important for you as the curator, it’s also important because you should be considerate and respectful of the other authors who are participating in the bundle. They’re trusting that you will ensure their stories are in a collection they can be proud of.

A related consideration is whether or not an author has indie-published previously. If not, you may need to help them find someone to format their ebook and/or design their cover, or else help them yourself. There’s absolutely nothing wrong with this – there are many talented authors out there who don’t know the difference between an epub and a mobi. But helping someone else may take more of your time, so make sure you feel comfortable with what you’re committing to.

Note that there are different types of bundles, so what you need from an author may change depending on the bundle and the site you’re going through. For example, BundleRabbit will soon be offering a collaboration feature, so the considerations with that will differ because the authors will coordinate on their own to create the ebook and cover.

Promotion

Do you, as the curator, want to handle all of the marketing? Or do you want the participating authors to help out?

Generally a bundle’s authors do things like post about the bundle on Facebook or Twitter, announce it in their newsletters, and/or write about it on their blogs. If you’re inviting an author who you know won’t do much, if any, promotion, are you doing so because they have a name/following that will help draw in readers? Because their writing is so good you don’t care if they promote the bundle? Because this is a friend, or an author you admire, and you want them to participate just because it makes you happy?

All of these situations are fine – just make sure you’ve thought through your reasons ahead of time. For example, if you plan to do the bulk of the bundle’s marketing on Facebook, and are expecting the authors to help out, it might not make sense to invite an author who doesn’t have a Facebook account.

Theme

Do you want to invite authors based on their writing ability, or on whether or not they have already published stories that fit the bundle’s theme – or both?

Suppose you’re curating an urban fantasy bundle. You might want to invite authors who already have multiple novels published in that genre in the hope that the bundle will appeal to the authors’ established fan bases. Or you might invite all the successful urban fantasy authors you know, then open the remaining slots up to people who you know will be able to write high quality stories that fit the theme. And, of course, you can just ask whoever you want regardless of what they’ve written and/or published in the past. 🙂 The key is to make sure you know what you’re doing and why.


However you choose to select who to invite to participate, it’s important to remember that a bundle is always a team effort to some degree. So whatever factors are important to you should be considered up front, not after you’ve invited someone and then realized they’re not a good fit.

Think through what’s important to you early on, and you – and the authors – will be happier with the end result.

How – and why – to put author information in your personal Facebook profile

Why should your personal Facebook profile contain your author information?

If you’re like most authors, you’ve probably used your personal Facebook profile to join writing-related groups, ‘liked’ Facebook pages that relate to a topic you write about, and so on. These groups and pages almost certainly contain members/followers who aren’t connected to you personally, so those people can only see things in your profile that you’ve made publicly available. That’s great, but it falls down if you want people to be able to find, say, your author website.

As a real-world example, about six months ago I was looking for authors to participate in a ghost-themed story bundle. I know plenty of talented people who could write great ghost stories, but I decided it would be fun to find a few new writers to work with who regularly write ghost stories, like Mark Leslie. I wandered through the various Facebook groups I’m in, found a few authors who sounded like they might fit the bill, and then went to look them up. Most of them either didn’t have links to their author websites on their personal profiles. I was able to find a few of them by googling, but not all, and after a while it got to be too time-consuming to try to track people down. I’m sure I missed a few authors who would have been perfect.

For the record, when I went to look at my own profile I discovered my author website was not visible to people who weren’t already connected to me. 🙂 But it is now!

How do you make author information on your personal profile public?

Here’s how to set your author website and social media links publicly available in your personal Facebook profile.

  • Go to your personal Facebook profile.
  • Click the ‘About’ button below your cover photo.
  • Click on ‘Contact and Basic Info.’
  • Make your website public.
    • Hover over ‘Websites’ in the ‘Websites and Social Links’ section. An ‘Edit’ button will appear to the right of this line. Click it.
    • Enter the URL to your website, if you haven’t already. Note that you can list multiple websites – for example, you might write under multiple pen names, and have one site for each.
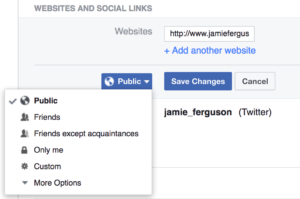
    • Set the visibility to ‘Public’ by using the dropdown link.
    • Click ‘Save Changes.’
  • Make your social media links public.
    • Hover over ‘Social Links’ in the ‘Websites and Social Links’ section. An ‘Edit’ button will appear to the right of this line. Click it.
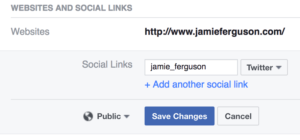
    • Enter whatever social media links you want to add. Keep in mind that the visibility setting will apply to all of them.
    • Set the visibility to ‘Public’ by using the dropdown link.
    • Click ‘Save Changes.’

You can verify that this worked by viewing what your profile looks like to the public (i.e. anyone, even people who are not connected to you).

  • Click the 3 dots to the right of ‘View Activity Log,’ which is on the bottom right side of your cover photo.
  • In the dropdown that pops up, click ‘View As.’
  • Click on ‘About,’ and verify that the information you specified as public is displayed.

What are story bundles, and why should authors care about them?

A story bundle is an ebook box set that has a few characteristics that make it different from standard ebook box sets.
The main story bundling websites right now are BundleRabbit, StoryBundle, and Humble Bundle. StoryBundle and BundleRabbit only bundle books; Humble Bundle also bundles games.

Availability

Bundles can be purchased through a bundling website and, depending on how that site works, may also be available through online stores like Amazon, iBooks, etc.

Most bundles are available for a limited time only – for example, a bundle might be available for three weeks, and then it’s gone forever. Availability is determined by the rules of the bundling site, and by the duration the curator sets.

For example, The Escapist Bundle is currently available on Storybundle, but only for another eighteen days. The Witches’ Brew bundle is available on BundleRabbit, Amazon, Kobo, iBooks, and Barnes & Noble, and at present there is no set end date for this collection.

How does one create a bundle?

The person who organizes a bundle is referred to as the curator. For StoryBundle and Humble Bundle, someone wanting to curate a bundle should contact the site; for BundleRabbit, anyone can create an account and put together a bundle.

The curator determines the theme, invites authors to participate, writes the sales copy, handles creation of marketing images if needed, sets the price, determines the duration of the bundle, decides if a portion of the sale price can be donated to charity, etc.

How can an author participate in a bundle?

If you know someone who is or will be curating a bundle, you can request to participate. Or you might suggest another author create a bundle, and offer one of your stories (this approach has the added advantage of you not having to do the organizational work…).

BundleRabbit is unique in that authors can upload stories they’d like to have in bundles; curators can search the available content and extend invitations to authors through the website.

How does the revenue split work?

The bundling site will take a percentage of the proceeds after taxes and fees, then the rest is split between the curator and the authors.

Unlike a typical anthology, the bundling website handles splitting and delivering the revenue. This is a huge plus for the curator as he/she can focus on the content, images, marketing, etc.

Why should an author want to participate in a bundle?

Bundles generally include stories from multiple authors, each of whom has their own set of fans. By participating in a bundle, an author’s work is exposed to readers who might not have come across it otherwise.

The authors typically each do some form of promotion, whether it’s posting on Twitter, sharing information on Facebook, or talking about the bundle in a newsletter or on a blog. Because there are multiple authors all doing promotion, each individual author gets more exposure than they would be able to on their own.

Three easy ways to use Facebook to get mailing list sign ups

Here are three different ways you can use a Facebook page to direct people to your mailing list/newsletter sign up page.

  1. Add a sign up button to your page
  2. Provide a link in your page’s cover photo
  3. Use an app to add a sign up tab and form

Add a sign up button to your page

Underneath the cover photo on your Facebook page is a button labeled “+ Add a Button.”


If you click on this you’ll see a popup containing a slew of options. To set up a link to your sign up page:

  • Select ‘Get in Touch,’ then on the next popup select ‘Sign Up.’
  • Enter the URL to the sign up page on your author/publishing press website and hit ‘Add Button.’

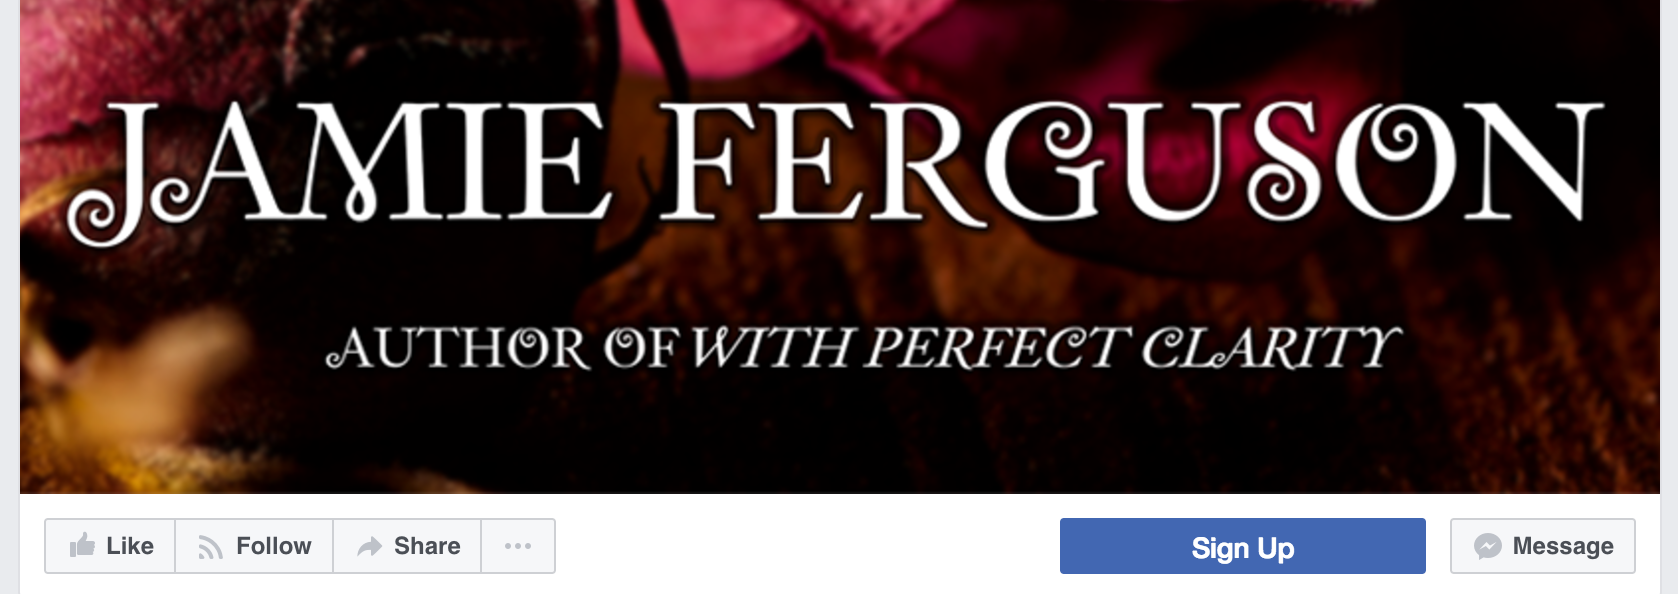
Your Facebook page now has a ‘Sign Up’ button that takes you to the link you entered. If you hover over the button you’ll see a ‘Test Button’ link – click it to verify that the button goes where you think it should.


Provide a link in your page’s cover photo

  • Click on your page’s cover photo.
  • Edit the description for the photo and add a link to your sign up page.
  • Save the description.

Now when someone clicks on your cover photo, the description – with the link you added – will be displayed.

Use an app to add a sign up tab and form

You can use an app to a tab to the sidebar of your page. When the user clicks on that tab, a sign up form will be displayed on your Facebook page.

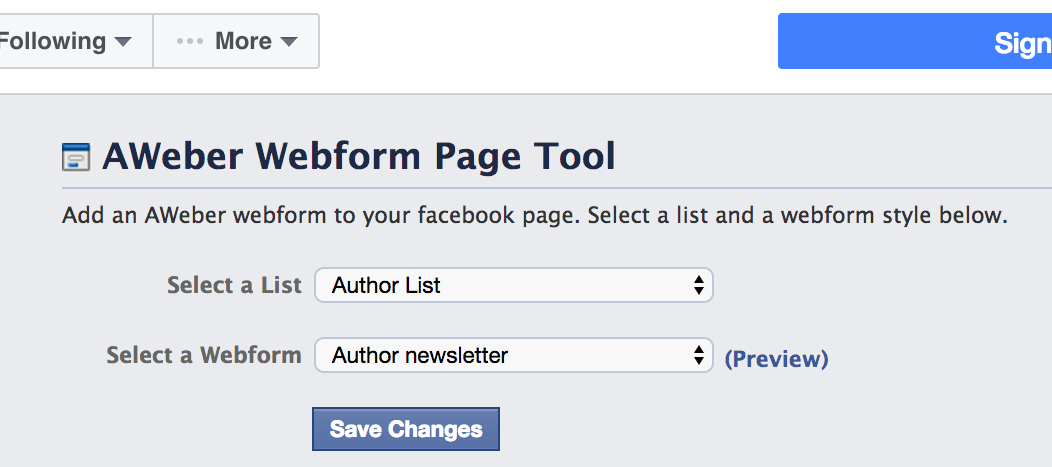
aWeber, Constant Contact, and MailChimp are a few of the companies who currently provide apps to integrate mailing list/newsletter sign ups with Facebook. Each app works a bit differently, so make sure to read the documentation for whichever one you use.

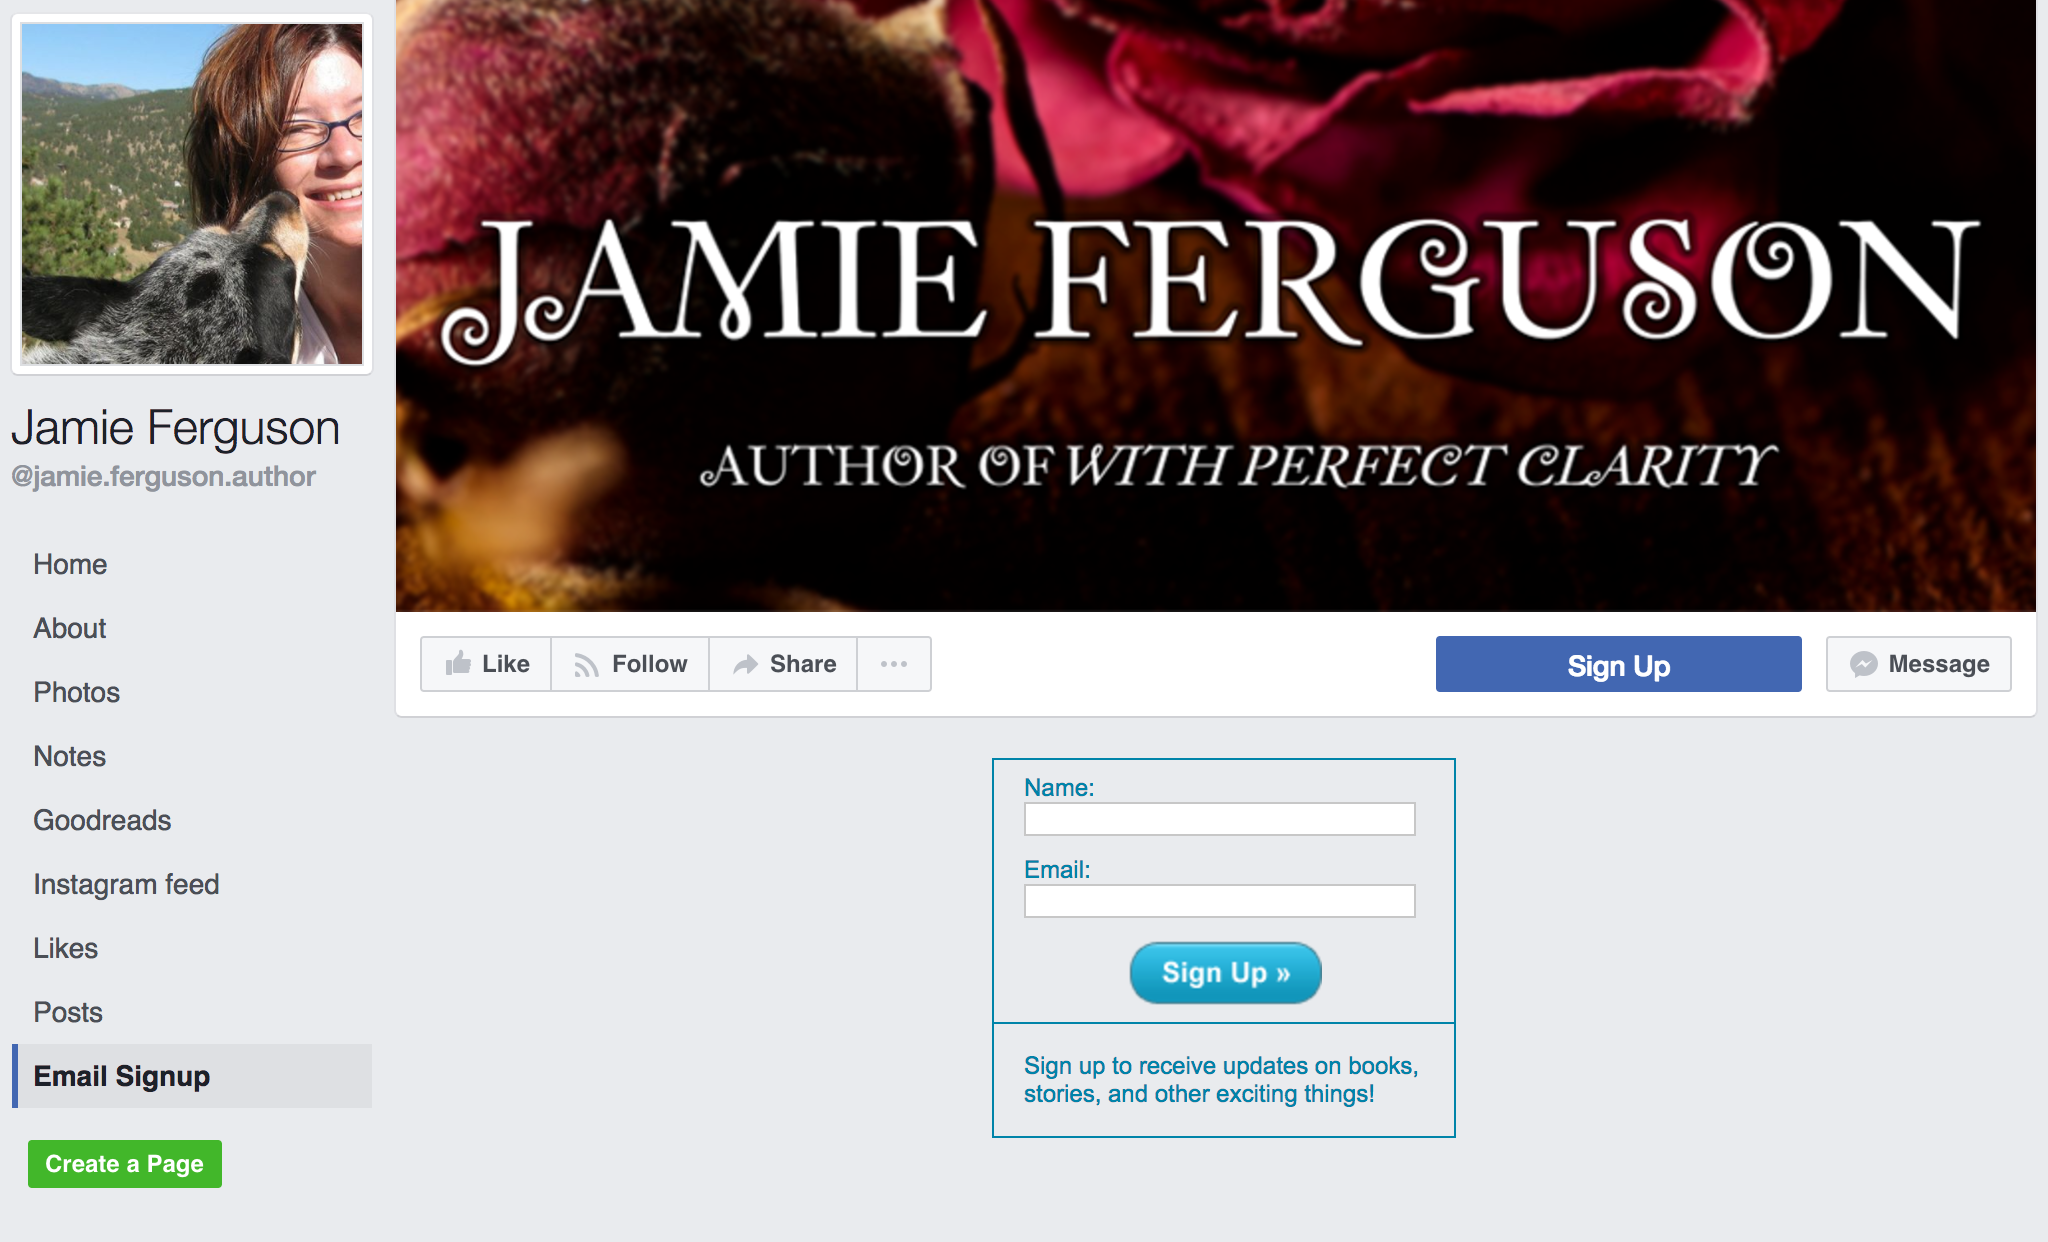
Here’s a screenshot showing how app configuration works with aWeber. Notice that the list and the form used are options, so you might create one form for use on Facebook and another for use on your website.


And here’s how this particular sign up form looks on a Facebook page. Notice the ‘Email Signup’ link at the bottom of the sidebar – clicking that takes you to this page. In this screenshot, there’s also a ‘Sign Up’ button under the cover photo that was created following the ‘Add a sign up button to your page’ steps above.


If your email marketing provider doesn’t offer an app, you can always write one yourself.