MavSocial is a social media management tool that can be used to:
- Track and monitor messages and notifications.
- Organize your images, videos, etc. in one place.
- Manage, schedule, and publish content to multiple social media platforms.
- Create and manage ‘campaigns.’
- View reports about engagement with your posts.
There are several different pricing plans, including a very basic free plan.
Note: I’m experimenting with social media content management tools to manage multiple Facebook pages, as well as several accounts on Twitter, Instagram, YouTube, etc., so this was my focus in exploring this tool.
Supported social media platforms
- YouTube
- Tumblr
Note that Instagram doesn’t allow third-party apps to publish directly to them, so you can create and schedule your Instagram posts with MavSocial, but need to use the mobile app Mav2Go (available for iPhones only) to publish your posts.
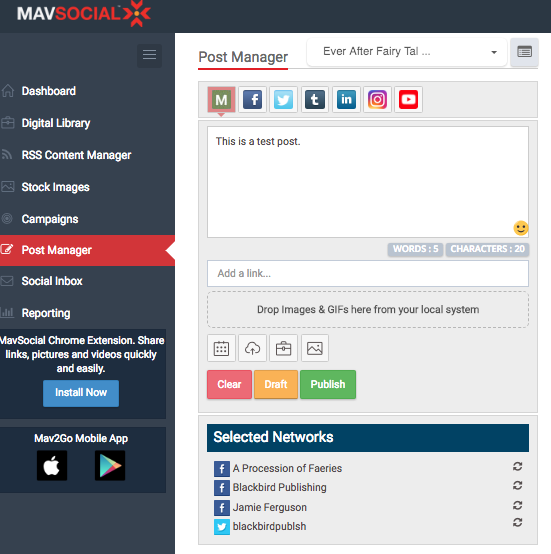
Creating and scheduling posts
The ‘Post Manager’ is used to schedule posts – but in spite of the name, it is not used to manage them. Posts are managed via campaigns.
To create a new post:
- Go to Campaigns > Campaign Planner, click on the name of an existing campaign, and then on ‘Add Post.’ This will take you to the Post Manager. (You can get to the posts a few different ways, like from the campaign page or the campaign calendar.)
- Go to the Post Manager and select the desired campaign from the dropdown. Note that the campaign must already exist, and you can’t create a new campaign from within the Post Manager.
You can save drafts, schedule posts, or publish them immediately.
Each post must be associated with either a campaign you’ve already created, or with the ‘Miscellaneous – Quick Posts’ campaign, which is the default campaign. A post may only be associated with one campaign, and it doesn’t appear possible to change the campaign associated with a post after the post has been saved.
One or more forms of social media must be associated with each post. If you have multiple Facebook pages, Twitter accounts, etc., you can select one or more to publish to. If you select multiple channels, you can’t edit channel-specific values. For example, if you select both Facebook and Twitter, you can’t edit ‘news feed targeting for pages’ which is Facebook-only.
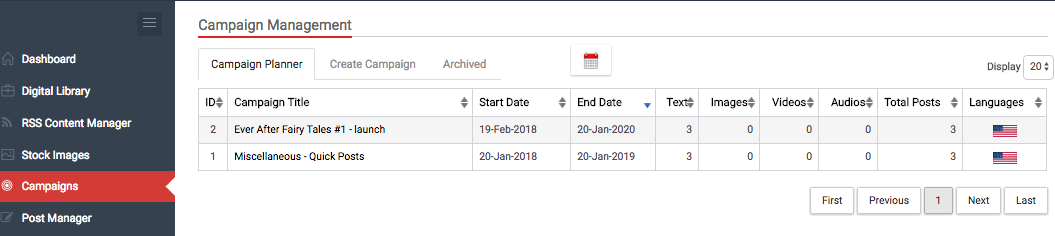
Campaigns
To create a new campaign, go to Campaigns > Create Campaign, or click on Create Campaign in either of the other campaign management tabs. You can create a single (one-time) campaign, or one that repeats.
Details for your active campaigns can be viewed under Campaigns > Campaign Planner, and you can see a calendar view in Campaigns > Campaign Calendar.
Social Inbox
The Social Inbox is where you can track posts and messages, reply to comments on your posts, ‘like’ comments, etc. Select the social media channel, and then you can narrow down what you see by page, account, etc.
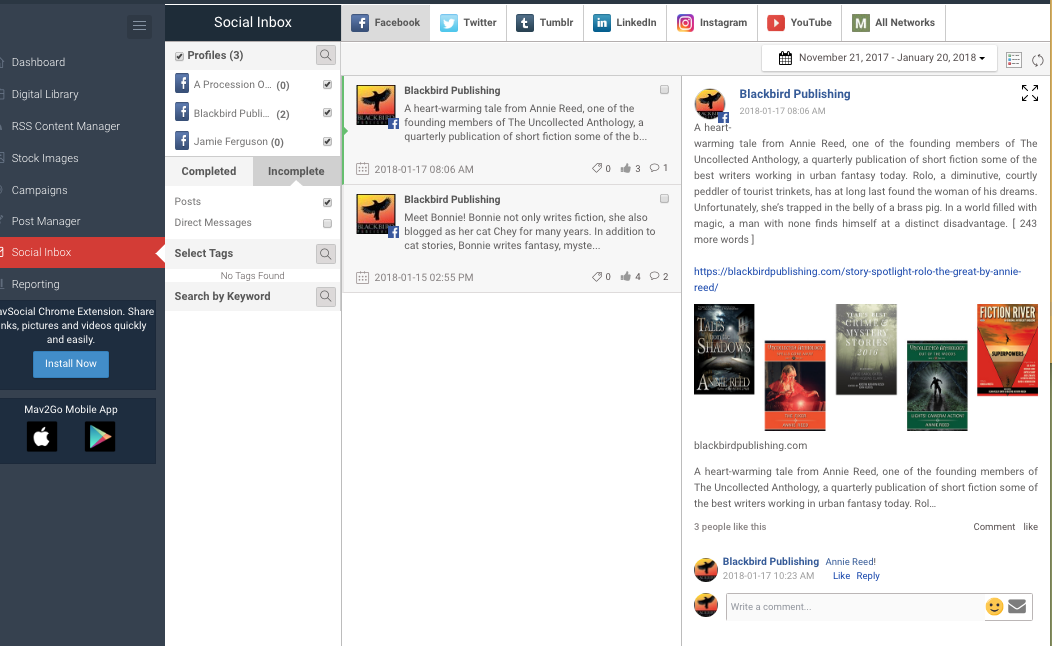
Mysteriously, only two posts from one of my Facebook pages show up here, and none of my Twitter posts are visible. They do show up in the Reporting tab, though.
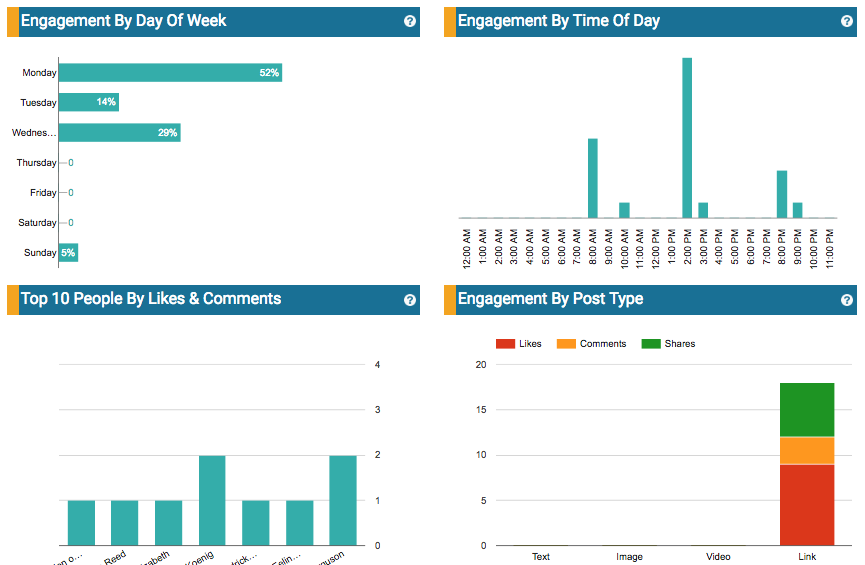
Reporting
You can view reports for your digital assets, by campaign, or by social media platform. For each social media platform, you need to select the page, account, etc. that you want to view data for.
The data you see in the reports varies by social media channel. For example, you can see information on ‘likes’ for Facebook, and on replies and mentions for Twitter. You can also export data.
References
Sign up for the Blackbird Publishing newsletter!