
Make a basic gradient layer with Photoshop
A gradient in an image is a gradual transition from one color to another color.
Example of using a gradient layer to make text stand out
Here are the before and after versions of a book cover where a gradient layer was used to improve the readability of the title text. The color transition is from one of the blues in the image itself, and because the opacity is set so low, the effect is very subtle.

And here’s what the gradient layer looks like without the image.

How to create a gradient layer
- Create a new layer.
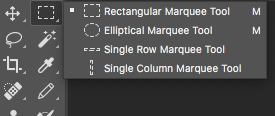
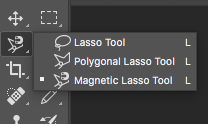
- In the new layer, create the desired shape using the appropriate selection tool. You can add a gradient to any shape.
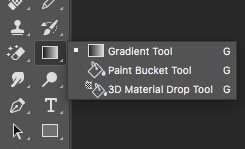
- Select the gradient tool.
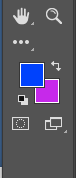 Select the two colors to transition between. This is done using the same color selection tool you normally use. The top square sets the starting color of your gradient, and the bottom selects the ending color. The top left corner of your window will show an example of what the gradient will look like.
- Select the desired type of gradient from the menu at the top left: linear, radial, angular, reflected, or diamond.

- Determine where on the shape you just created that you want the gradient to start. Click on this spot and hold the mouse down.
- Drag the mouse pointer to wherever the gradient should end. You’ll see a line from the starting point to the end point. Release the mouse.
- The gradient you created will appear on your layer.

References
- Photoshop help: Gradients
- How to Make a Gradient in Photoshop
- Shutterstock support: How to Make a Transparent Gradient in Photoshop
Photoshop version
The version of Photoshop used for this post was the 2017.1.1 Release of Adobe Photoshop CC, 20170425.r.252 x64, on OS X 10.13.1.